
How to Start Seeds Indoors: The Complete Beginner’s Guide
How to start seeds indoors: complete guide to timing, light, heat mats and hardening off, so your seedlings thrive when they finally reach the garden beds.
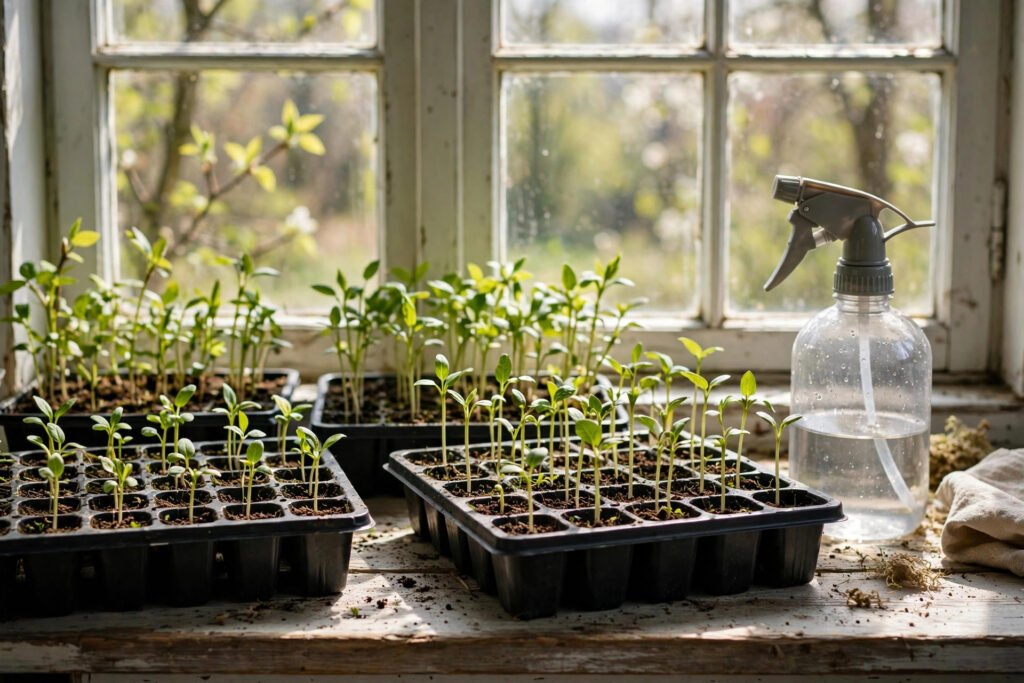
There is a particular magic in watching a seed you sowed become a seedling, then a plant, then dinner. Starting seeds indoors extends the British growing season by weeks, saves serious money versus buying transplants, and gives you access to varieties no garden centre stocks. It is also, frankly, one of the most satisfying things you can do in late winter.
This complete guide covers everything: timing, equipment, sowing technique, light, heat, watering, hardening off, and troubleshooting the problems that beset every beginner.
Why Start Indoors?
Britain’s growing season is short, and many crops need a head start. Tomatoes, peppers, and aubergines sown directly outdoors in May simply run out of summer; started indoors in March, they fruit abundantly. Indoor sowing also gives you control: no slugs, no downpours washing seeds away, no cold snaps killing germination. And the economics are compelling: a £3 packet of tomato seeds yields dozens of plants that would cost £2-3 each as transplants.
Timing: The Make-or-Break Factor
The commonest beginner error is starting too early. Leggy, light-starved seedlings sown in January rarely recover; correctly timed March sowings overtake them within weeks. Work backwards from your last frost date (late April to late May depending on region) using each packet’s “sow indoors X weeks before last frost” guidance.
A rough UK calendar: chillies and aubergines in February (they are slow), tomatoes and peppers in March, courgettes, squash, and beans in April (they grow fast and hate waiting), salads and herbs successionally from March. The BBC Gardeners’ World sowing calendars give month-by-month specifics.
What You Actually Need
Keep it simple: seed trays or small pots, a peat-free seed compost (finer than multipurpose), a spray bottle, labels, and a bright windowsill. A heated propagator or heat mat dramatically improves germination for heat-lovers like peppers, but many seeds germinate fine at room temperature. Grow lights are the single best upgrade for serious indoor sowers: a basic LED panel prevents the legginess that plagues windowsill seedlings.
You do not need: expensive “seed starting kits”, fertiliser at sowing time (seeds carry their own food), or bottom heat for everything. Spend money on light before heat.
Sowing Technique
Fill containers with moist (not wet) compost, firm gently, and sow at the depth on the packet, generally twice the seed’s diameter; tiny seeds sit on the surface. Cover with a thin layer of vermiculite, which retains moisture while letting light through. Label everything immediately: seedlings all look alike, and mystery plants are a rite of passage nobody enjoys.
Water from below or with a fine spray to avoid dislodging seeds. Cover with a propagator lid or clear bag to retain humidity, but ventilate daily to prevent damping-off, the fungal disease that fells seedlings at soil level.
Light, Heat, and Water
Light is everything once seeds sprout. A south-facing windowsill works; anything less produces leggy seedlings stretching desperately toward the glass. Rotate pots daily for even growth, and consider a grow light positioned centimetres above the seedlings, raised as they grow. Sixteen hours of light daily mimics spring.
Most seeds germinate best at 18-21°C; a warm (not hot) spot like the top of a fridge works without a propagator. Once sprouted, cooler conditions (15-18°C) produce stockier plants. Water carefully: keep compost moist but never soggy, and always water in the morning so foliage dries by night.
Pricking Out and Potting On
When seedlings develop their first true leaves (the second pair, distinct from the initial seed leaves), prick them out: lift each by a leaf, never the stem, and transplant into individual pots of multipurpose compost. Handle gently, water in, and keep out of direct sun for a day while they recover.
Pot on progressively: a seedling moved straight into a huge pot sits in cold, wet compost it cannot use. Step up one pot size at a time, and feed with half-strength liquid fertiliser once established. The RHS seed-sowing guidance details the technique with excellent illustrations.
Hardening Off: Don’t Skip This
Indoor seedlings moved straight outside suffer transplant shock: sunburn, wind damage, cold nights. Hardening off acclimatises them over 7-10 days: place outside in shelter for a few hours daily, increasing exposure, and bring in at night. By the end, they stay out permanently. Skipping this step kills more seedlings than any other single error; the week of patience pays for itself.
Troubleshooting Common Problems
Leggy seedlings: insufficient light; add a grow light or sow later. Damping off: fungal; improve ventilation, water less, use fresh compost. Seeds not germinating: check temperature and seed age; old seeds lose viability. Yellowing: usually overwatering or cold; ease off and warm up. Pests indoors are rare but watch for fungus gnats in constantly wet compost.
Once your seedlings are thriving and planted out, give them the best start with proper soil: our guide to preparing garden soil for vegetables covers the groundwork, and building raised beds on a budget offers the ideal home for your homegrown transplants.
Seed Saving: Next Year’s Free Seeds
Once you are growing, saving seeds closes the loop beautifully. Easy wins for beginners: tomatoes (ferment the gel off, dry the seeds), beans and peas (leave pods to dry on the plant), and lettuce (let one plant bolt and collect the fluffy seed heads). Save from your healthiest, best-tasting plants, and the varieties gradually adapt to your specific garden: a genuine landrace in miniature. Store seeds cool, dry, and dark in labelled envelopes; most remain viable for years. One caution: F1 hybrid varieties do not come true from seed, so save only from open-pollinated or heirloom types. Seed saving connects you to ten thousand years of agriculture and makes next year’s sowing gloriously free.
Seed viability guide
Parsnips lose viability within a year, so sow fresh; tomatoes and brassicas last four to five years; beans and peas three to four. When in doubt, sow a few extra as insurance.
Conclusion
Starting seeds indoors is a skill that compounds: each year your timing improves, your setup refines, and your harvests grow. Begin with easy wins like tomatoes and courgettes, respect the calendar, prioritise light, and harden off religiously. By midsummer, you will be eating the proof.
Frequently Asked Questions
When should I start seeds indoors in the UK?
It depends on the crop: chillies in February, tomatoes and peppers in March, courgettes and beans in April. Always work backwards from your area’s last frost date using packet guidance.
Do I need a grow light?
Not for a few trays on a bright south-facing windowsill, but grow lights are the best upgrade for serious sowing: they prevent legginess and let you start earlier with confidence.
Why are my seedlings tall and floppy?
Insufficient light is the usual cause. Move to the brightest spot available, add supplementary lighting, and in future sow slightly later when days are longer.
Can I sow seeds directly outdoors instead?
Yes, for hardy crops like carrots, parsnips, and broad beans sown at the right time. But tender crops need the indoor head start, and indoor sowing gives you control over germination whatever the weather does.
What is damping off?
A fungal disease that causes seedlings to collapse at soil level. Prevent it with fresh compost, good ventilation, careful watering, and avoiding overcrowding.