
How to Grow Crystals at Home With Kids: Fun Guide
Learn how to grow crystals at home with kids: safe sugar, salt and alum crystal projects with step-by-step instructions for sparkling results in days.
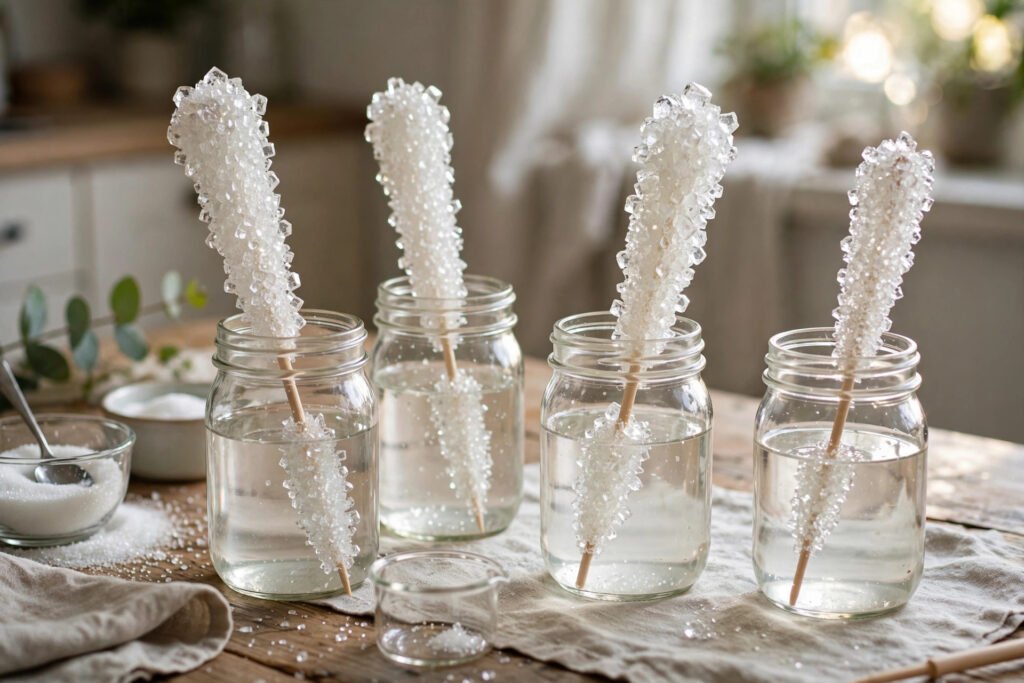
Growing crystals at home is the rare children’s activity that is genuinely magical and genuinely scientific at the same time. Within days, ordinary kitchen ingredients transform into glittering geometric structures — and every step demonstrates real chemistry: saturation, nucleation and crystal lattices. It is cheap, safe with supervision, and the results are beautiful enough to keep. Here is how to grow impressive crystals with kids, with three methods from easy to spectacular.
The science in one minute (for the grown-ups)
Crystals form when a solution holds more dissolved solid than it normally could — a supersaturated solution — and the excess has nowhere to go but into orderly structures. As the water cools or evaporates, molecules lock into repeating lattice patterns, which is why crystals have flat faces and sharp angles. A “seed” crystal or rough surface gives the process a starting point (nucleation). The Royal Society of Chemistry’s education resources include crystal-growing guides with the full chemistry explained for keen young scientists. Understanding this helps when things go wrong: no crystals usually means the solution was not saturated enough.
Method 1: sugar crystals (easiest, edible)
The classic, and completely safe. Heat 250ml of water to near-boiling, stir in sugar a spoonful at a time until no more dissolves (around 500g — far more than cold water could hold). Add food colouring if you like. Pour into a clean glass jar, dip a wooden skewer in the solution then roll it in dry sugar to create seed crystals, and suspend it in the jar with a peg so it does not touch the sides or bottom. Cover loosely with cling film. Then wait: over 5–10 days, spectacular rock-candy crystals grow. Patience is the only difficult ingredient.
Method 2: salt and Epsom salt crystals (faster)
For quicker results, Epsom salt (magnesium sulphate, from pharmacies) grows needle-like crystals within hours. Dissolve Epsom salt in hot water until saturated, pour into a shallow dish, and leave undisturbed — delicate frost-like crystals form as it cools and evaporates, sometimes within a single afternoon. Table salt grows classic cubic crystals more slowly (several days) in a saturated solution left to evaporate. Comparing the two side by side — needles versus cubes — is a brilliant mini-lesson in how different substances build different lattices. This comparative approach is what makes kitchen science so effective for learning, much like the kitchen chemistry of baking sourdough bread, where fermentation does the magic.
Method 3: alum crystals (most spectacular)
Alum (potassium aluminium sulphate, available online and in some pharmacies) grows large, glass-clear octahedral crystals that look genuinely precious. Dissolve alum in hot water to saturation, let it cool, and fish out the small seed crystals that form. Tie the best one to a thread, suspend it in fresh saturated solution, and leave it for a week or two, topping up with saturated solution as it evaporates. The seed grows into a single large crystal — with care, marble-sized or bigger. This is the method for the mantelpiece-worthy result.
Tips for success with kids
Supervise all hot water handling — adults do the boiling and pouring. Let children do the stirring, seed-dipping, observing and measuring; ownership of the process keeps them engaged through the waiting. Keep a simple observation diary with drawings or photos every day — the slow transformation is the lesson, and recording it teaches scientific observation. Pair the project with easy baking recipes for kids for a full kitchen-science weekend. Label jars with the substance and date. And manage expectations: the first attempt sometimes fails (usually under-saturation), which is itself a fine lesson in how science actually works — try again with more dissolved solid.
Extend the learning: weigh the crystals at the end, measure growth, test which solution grew fastest. These small investigations build the habits of real science. For more structured inspiration, organisations like the Science Museum Group offer excellent family experiment ideas online.
Safety notes
Sugar and table salt methods are food-safe throughout. Epsom salt and alum are not for eating — label clearly and wash hands after handling. Keep all solutions away from very young children unsupervised, and never let children handle boiling water. All the chemicals here are low-hazard, but “low-hazard” still means supervised.
Crystal growing as a science fair project
A jar of sugar crystals becomes a genuine science project with one addition: a question. “Which substance grows the biggest crystals?” (test sugar, salt, Epsom salt and alum side by side). “Does temperature affect growth rate?” (one jar warm, one cool). “Do seed crystals matter?” (seeded versus unseeded jars). Each is a proper experiment with a hypothesis, variables, measurements and a conclusion — exactly what science fairs assess. Photograph daily, measure the largest crystal with a ruler, and present the results on a board with the method written up.
Judges love visible, well-documented experiments, and crystal projects score highly because they demonstrate real chemistry over days, not minutes. Level up with a research section: how are industrial crystals grown (silicon for chips, synthetic gems)? What are crystal lattices? Older students can calculate growth rates and graph them. The project teaches the full scientific method — and unlike the baking-soda volcano everyone else brings, it shows patience and precision. Win or lose, the child learns that science is mostly careful observation, which is the truest lesson of all. One more tip for the impatient: growing crystals teaches the rarest modern skill — sustained attention to a slow process. In a world of instant everything, a child who checks their jar daily for two weeks and is rewarded with glittering crystals learns something no app can teach: that the best things take time.
Conclusion
Growing crystals at home needs only hot water, a dissolved solid, patience and a seed to start from. Sugar gives edible rock candy, Epsom salt gives overnight frost, and alum gives gem-like showpieces. Pick one, involve the kids in every safe step, and enjoy the rare activity that is as educational as it is beautiful.
Frequently Asked Questions
How long do sugar crystals take to grow?
Typically 5–10 days for impressive rock candy. Warmer spots and more saturated solutions grow faster; cool draughts slow things down.
Why are my crystals not growing?
Almost always under-saturation — not enough solid dissolved. Reheat the solution and dissolve more, ensure a good seed crystal, and keep the jar somewhere still and undisturbed.
Are homemade crystals safe for children?
Sugar and salt crystals are completely safe and edible. Epsom salt and alum crystals are not edible but are low-hazard; supervise handling and hand-washing.
Can I grow bigger crystals?
Yes — use the seed-crystal method with alum: grow a small crystal, then suspend it in fresh saturated solution, topping up as it evaporates. Single large crystals take one to three weeks.
What is the best crystal for beginners with kids?
Sugar rock candy: safe, edible, cheap, and reliably impressive. Graduate to Epsom salt for speed and alum for beauty once the basics click.
Can you eat homemade crystals?
Sugar and table-salt crystals, yes — they are just food. Epsom salt and alum crystals are not edible: label those jars clearly and wash hands after handling them.
Why do crystals have flat faces and sharp edges?
Because they are built from repeating lattice structures at the molecular level — the flat faces are the outward expression of that internal order. Different substances build different lattices, which is why salt makes cubes and alum makes octahedrons.