
How to Paint a Room Like a Professional Decorator
How to paint a room like a professional decorator — prep, cutting in, rolling technique and the finishing touches that separate DIY from pro.
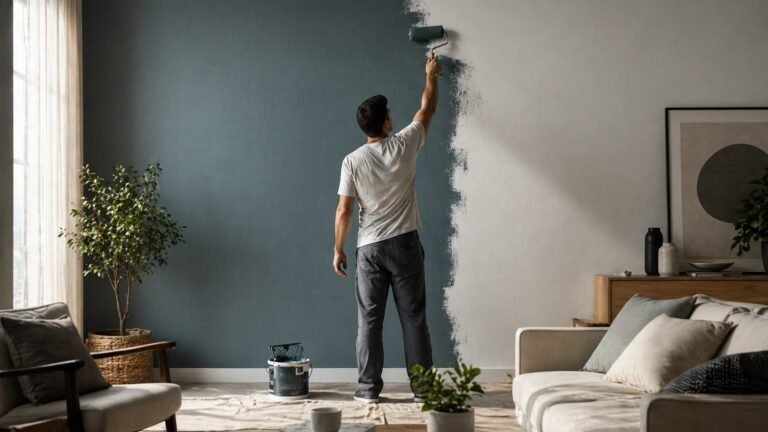
The difference between a DIY paint job and a professional one has almost nothing to do with talent and almost everything to do with preparation. Pros spend 70% of the job on prep and 30% on painting; DIYers do the reverse, then wonder why the finish looks patchy. I’ve painted every room in two houses now, and the second house looks dramatically better — not because my brushwork improved, but because I finally learned to prep properly.
Here’s how to paint a room like a professional decorator, step by step: the prep that matters, the cutting-in technique, how to roll without streaks, and the finishing details that make guests ask who you hired.
Preparation: the 70% that makes the difference
Start by emptying the room as much as possible — painting around furniture is how skirting boards get splattered. Remove curtain poles, switch plates and door handles (or mask them meticulously). Wash the walls with sugar soap: paint doesn’t stick properly to grease, nicotine or the invisible film of cooking residue, and this one step prevents more peeling than any primer.
Then fill and sand. Every crack, dent and nail hole gets filled, left to dry, and sanded flush — run your hand over it with your eyes closed; if you can feel it, you’ll see it through paint. Caulk the gaps between skirting and wall, and between architrave and wall, for those crisp lines pros are famous for. Finally, mask: quality low-tack tape on skirting, window frames and ceilings, pressed down firmly with a putty knife so paint can’t bleed underneath.
- Sugar-soap the walls; paint won’t bond to grease or grime.
- Fill, sand, caulk — if you can feel it with eyes closed, you’ll see it.
- Mask with quality tape, burnished down firmly to stop bleed.
Choosing paint and tools that do the work for you
Buy the best paint you can afford — this is the worst place to economise. Premium emulsions (Dulux Diamond, Johnstone’s, Farrow & Ball if you’re feeling flush) cover in fewer coats, don’t spatter and touch up invisibly. For most rooms, a durable matt or eggshell beats flat matt: it looks the same on the wall but survives actual living. One 5L tin covers roughly 60m² per coat; two coats is standard.
Tools matter as much as paint. A 9-inch roller with a medium pile sleeve for walls, a 2-inch angled sash brush for cutting in, a paint kettle (not the tin — decant it), and a sturdy extension pole so you’re rolling with your body, not your wrist. Washable dust sheets, not plastic — plastic is slippery and paint pools on it. If you’re also doing the kitchen, read our guide to the best paint for kitchen walls — kitchens need tougher finishes than living rooms.
How to paint a room like a professional decorator: cutting in
Cutting in — painting the edges where roller can’t reach — is the skill that separates the pros. Load the angled brush about a third of the way up the bristles, tap off the excess (never wipe both sides), and paint a 5–7cm band along the ceiling line, skirting and corners. The technique: push the brush to about 3mm from the edge, then draw it along in one smooth motion, letting the paint flow rather than scrubbing.
Work in sections of about a metre, and always roll the wall while the cut-in is still wet — painting wet-on-wet blends the brush marks into the roller texture so the edges disappear. This is the single most important timing trick in decorating. Pros cut in one wall, roll it, then move on; they never cut in the whole room first.
- Load brush 1/3 up, tap excess, one smooth stroke 3mm from the edge.
- Cut in one wall, then roll it immediately — wet-on-wet hides brush marks.
- Keep a damp cloth handy for instant wipe-ups of mistakes.
Rolling technique: no streaks, no patches
Load the roller evenly — roll it in the tray until the sleeve is saturated but not dripping. Apply paint in a W or M pattern over about a square metre, then fill it in with parallel strokes, finishing with light vertical passes in one direction (‘laying off’). Consistent direction on the final pass is what prevents the patchy, streaky look.
Maintain a wet edge: always roll into the still-wet area you just painted, never let an edge dry before you overlap it. In warm rooms, work faster or close the windows slightly — paint drying too fast causes ‘flashing’, those dull patches where wet met dry. Two thin coats always beat one thick one; thick coats drip, sag and take forever to cure.
The finishing touches
Remove masking tape while the final coat is still slightly tacky — pull it back on itself at 45 degrees for the cleanest line. If paint has bled under the tape, a damp artist’s brush cleans it up before it cures. Refit switch plates and handles only when the paint is fully dry (24 hours for most emulsions), or you’ll leave fingerprints in soft paint.
Step back and inspect in daylight and with the room’s lights on — different light reveals different flaws. Touch up with the original brush, feathering the edges. Then the pro move: label the tin with the room, date and colour code, and keep a small jam jar of touch-up paint. Future you, facing a scuffed wall, will be absurdly grateful. And if the walls needed work first, our guide to plastering costs covers when to call in a plasterer instead of filling.
- Pull tape at 45° while paint is tacky for razor-sharp lines.
- Inspect in daylight and lamplight — each reveals different flaws.
- Label tins and keep touch-up jars; future scuffs are inevitable.
Professional-looking paintwork isn’t a gift — it’s a sequence: prep obsessively, buy decent paint, cut in then roll wet-on-wet, and finish the details. Follow that order and your room will look like you hired someone, at a tenth of the cost. The only real secret decorators have is patience. Borrow some of theirs. Which?’s decorating guides have useful independent tests of the paints and tools mentioned here.