What Is the Best Paint for Kitchen Walls?
What is the best paint for kitchen walls? The toughest washable finishes, sheen levels and colours that survive real cooking — tested advice.
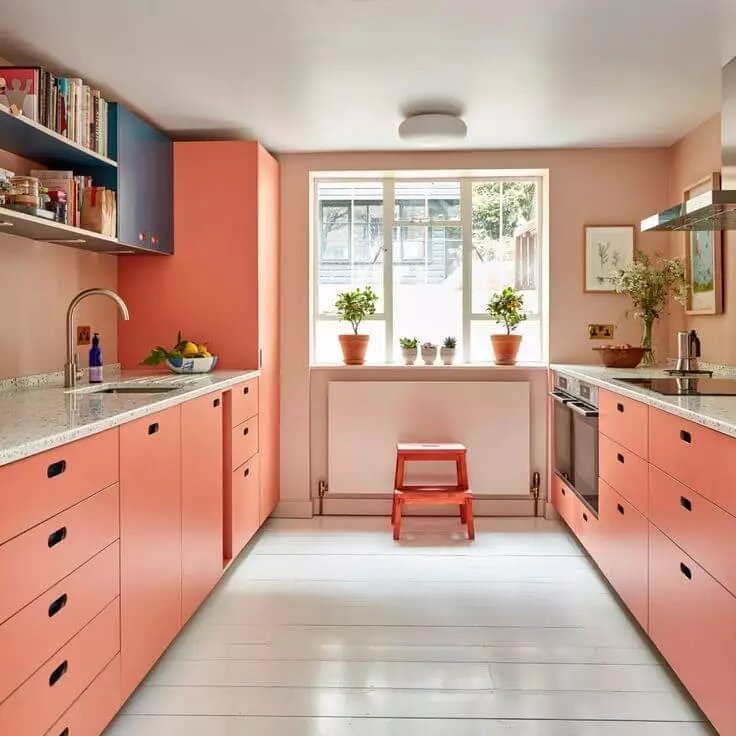
Kitchen walls live a hard life. Steam, grease, splashes of turmeric, sticky fingerprints at toddler height, and the occasional full-scale cooking disaster — all in a room where temperature and humidity swing wildly. Standard wall emulsion gives up within a year: it marks, it won’t wash, and the bit behind the hob goes shiny and sad.
So what is the best paint for kitchen walls? It’s not about the colour — it’s about the chemistry. Here’s what actually survives: the finishes designed for kitchens, which sheen to choose, and the colours that hide real life.
What is the best paint for kitchen walls: the finishes
The answer is a dedicated kitchen paint or a quality washable emulsion — not standard matt. Dulux Easycare Kitchen, Johnstone’s Kitchen & Bathroom, and similar ‘kitchen’ formulations use acrylic resins that resist moisture and grease, and they’re scrubbable: you can actually wash them without the paint coming off on the cloth. That’s the whole point — kitchen walls need washing, and normal emulsion doesn’t survive it.
In sheen terms: matt kitchen paint (the dedicated formulations, not standard matt) for most walls — it hides imperfections and looks modern. Eggshell or satin for woodwork and high-splash zones — tougher and more wipeable. Avoid standard vinyl matt and anything labelled ‘contract matt’ in a kitchen; they’re designed for ceilings and new plaster, not for life near a hob. Expect to pay £35–55 for 5L of proper kitchen paint — worth every penny over the £20 basic stuff.
- Use dedicated kitchen paint or premium washable emulsion — never standard matt.
- Matt kitchen paint for walls; eggshell/satin for woodwork and splash zones.
- Budget £35–55 for 5L; the chemistry is worth the premium.
Prep: kitchens need more of it
Kitchen walls need serious prep because paint fails on grease, not on clean plaster. Sugar-soap every wall — twice behind the hob and near the cooker. If the existing paint is glossy, sand it lightly to give the new paint a key. Fill and sand imperfections, then use a stain-blocking primer on any marks that won’t wash off (turmeric, nicotine, water stains) — paint alone won’t cover them, however many coats you apply.
The area behind the hob deserves special thought: even the best paint struggles with direct heat and grease long-term. If you’re renovating, a tiled splashback behind the hob with painted walls elsewhere is the professional combination — tiles where the abuse happens, paint where it doesn’t.
Colours that survive real kitchens
Colour choice in kitchens is practical as much as aesthetic. Mid-tones hide best: warm greys, sage greens, soft putty colours disguise splashes and marks far better than brilliant white (shows everything) or very dark colours (show every dust mark and water spot). If you love white kitchens, choose a white with a warm undertone and accept you’ll wash it more often.
Finish affects colour perception: the same colour looks darker in eggshell than in matt, and kitchen lighting (often cool LEDs) can make colours look colder than the tester suggested. Always test with a proper sample pot on the actual wall, look at it in daylight and evening light, and live with it for 48 hours. The £5 sample pot has saved more decorating disasters than any other product in history.
- Mid-tones (warm grey, sage, putty) hide real life best.
- Brilliant white shows everything; very dark shows dust and water spots.
- Sample pot on the real wall, 48 hours, daylight and evening light.
Application tips for kitchen paint
Kitchen paint is thicker than standard emulsion — that’s the resins doing their job. Don’t thin it unless the tin says to; instead, work in slightly smaller sections and maintain a wet edge. Two coats are essential — the first coat seals, the second provides the washable film. Cutting in needs care around units and worktops: use quality low-tack tape and remove it while the paint is tacky.
Ventilation matters more in kitchens: open windows and run the extractor while painting and for 24 hours after. Humidity slows curing, and kitchen paint needs a full cure (up to 2–4 weeks for maximum hardness) before you scrub it aggressively. Be gentle with new paint for the first month — it feels dry in hours but reaches full toughness slowly. The technique basics are in our guide to painting like a professional decorator.
- Don’t thin it; two coats essential — the second coat is the washable layer.
- Ventilate well; allow 2–4 weeks for full cure before scrubbing.
- Tape edges, remove tape while tacky, be gentle for the first month.
When paint isn’t the answer
Be honest about the zones. Directly behind the hob and sink, tiles or a proper splashback outperform any paint — heat, steam and constant splashing will defeat even the best kitchen paint within a couple of years. Behind the bin and the kettle (limescale + steam) is another high-abuse zone worth tiling.
And if the walls themselves are in bad shape — blown plaster, persistent damp, grease soaked so deep it won’t wash out — no paint fixes that. Address the substrate first: our guide to plastering costs covers when a skim is the real answer. Paint is a finish, not a repair — it only looks as good as what’s underneath it.
- Tile behind hobs and sinks — no paint survives direct heat and steam long-term.
- Fix the substrate first: paint can’t rescue blown plaster or deep grease.
- Paint is a finish, not a repair.
The best paint for kitchen walls is a dedicated kitchen formulation in a mid-tone matt — scrubbable, grease-resistant, and forgiving of real life. Prep it like you mean it (sugar soap twice), apply two coats, tile the abuse zones, and give it a month to cure fully. Do that and your kitchen walls will still look fresh when the next decorating urge strikes in five years — instead of looking tired by Christmas. One final tip: keep a small touch-up kit. Kitchens get marked — it is what they are for — and the ability to dab a scuff with the original paint in thirty seconds is what keeps walls looking fresh for years rather than months. Decant a jam jar’s worth when you finish painting, label it with the colour, finish and date, and store it somewhere sensible — not the garage, where it freezes. Touch up marks as they happen instead of letting them accumulate into a full repaint. Five minutes with a small brush every few months beats repainting every two years. Which?’s decorating guides test kitchen paints for scrubbability and stain resistance.