How to Photograph the Moon With Your Phone
Learn how to photograph the moon with your phone: the best settings, focus and exposure tricks for sharp, detailed lunar shots — no telescope required.
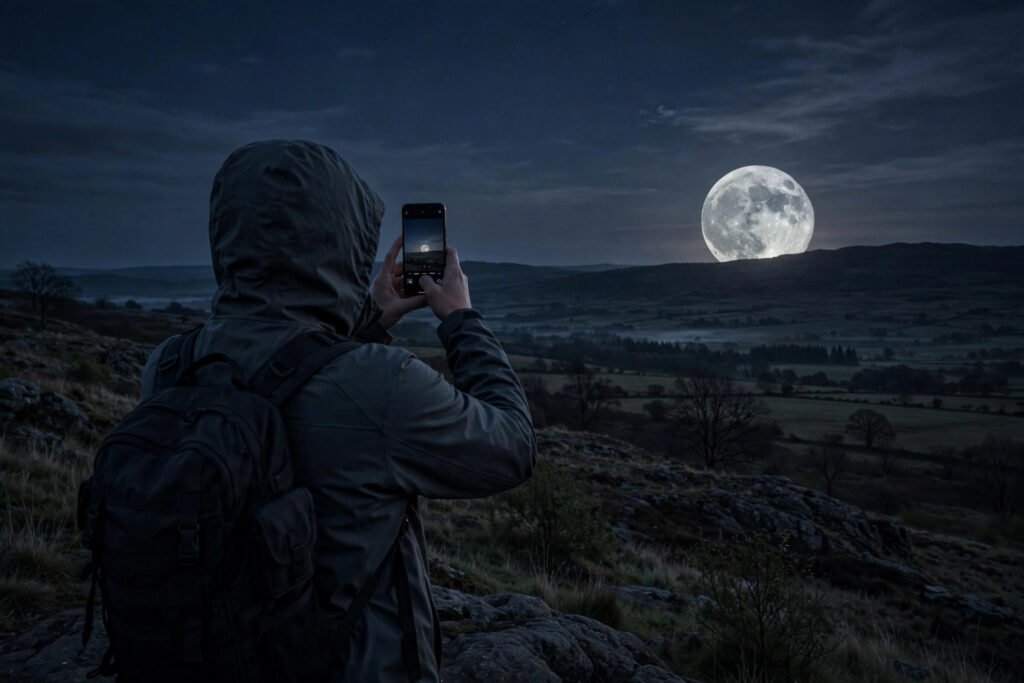
Some of the most breathtaking moon photos on social media were taken not with telescopes but with phones. Modern smartphones — with their computational photography, high zoom levels and manual controls — are genuinely capable of capturing the moon in striking detail: craters, maria, the terminator line where shadow meets light. But pointed-and-shot, the moon usually comes out as a white blob. Here is how to photograph the moon with your phone properly, from planning to processing.
Understand the challenge
The moon is small, bright and moving. Your phone’s auto mode sees a mostly black frame with one bright spot and does the worst possible thing: it overexposes the moon into a featureless white disc while trying to brighten the sky. The entire technique comes down to defeating auto mode — locking focus and exposure on the moon itself, so the camera exposes for the bright disc rather than the dark sky. Everything else is refinement.
Planning: timing beats equipment
The best moon photos are rarely of the full moon. A full moon is flatly lit — like a face photographed with on-camera flash — washing out crater detail. The magic happens around the quarter phases, when sunlight rakes across the surface at an angle and the terminator (the day-night line) throws long shadows that reveal topography in dramatic relief. The days just after new moon offer the bonus of a thin crescent with earthshine. Check moonrise times — a moon low on the horizon looks enormous (the moon illusion) and lets you compose it with landscapes, trees or buildings for scale. Apps that show moon position help enormously, and the same skywatching instincts apply: dark skies, clear horizons, patience. The Royal Observatory Greenwich’s astronomy guides are superb for planning a session, and NASA’s science pages explain the lunar features you will be photographing.
The technique, step by step
First, stabilise: brace the phone against something solid or use a small tripod — at high zoom, hand shake ruins everything. Open your camera app, zoom to maximum optical zoom (avoid digital zoom beyond that; it just enlarges pixels), and tap on the moon to focus. Then lock it: on iPhones, long-press to lock AE/AF; on Android, use pro/manual mode if available. Drag the exposure down until the moon shows detail rather than a white blob — this single adjustment transforms results. If your phone has a night mode, try it off as well as on; night mode’s long exposures can blur the moving moon. Shoot in RAW if your phone offers it — RAW files retain far more detail for editing. Take many shots; the moon moves surprisingly fast at high zoom and focus drifts.
Refine with editing
Phone moon shots almost always improve with a light edit: lower the highlights, raise the shadows slightly, add clarity or texture to bring out craters, and crop to compose. Do not over-sharpen — it creates crunchy artefacts. Subtle is the goal: the best edits are invisible. Free apps like Snapseed or Lightroom Mobile handle all of this, and shooting RAW gives you the most latitude. Compare before and after at full zoom to keep yourself honest.
Going further: accessories that help
A clip-on telephoto lens (£20–£40) meaningfully extends your reach beyond the phone’s built-in zoom. Dark locations help enormously too — viewpoints in the Peak District offer some of the most accessible dark skies in England. But master the phone first — the skills (planning, exposure control, patience) transfer directly to any camera.
Common mistakes
Shooting the full moon and wondering why it looks flat. Using digital zoom past the optical limit and getting mush. Forgetting to lock focus, so the phone hunts and blurs. Shooting through windows or heat haze (shoot outside, let the phone acclimatise). And giving up after three blurry attempts — lunar photography has a learning curve of an evening or two, not months.
Lunar features to photograph: a guided tour
Once the technique clicks, the Moon offers endless subjects. Start with the great maria — the dark “seas” (ancient lava plains): Mare Imbrium, Mare Serenitatis, Mare Crisium, each with distinct character. Then the ray craters: Tycho, with bright rays splashed across the southern highlands, and Copernicus, whose terraced walls show beautifully near the terminator. The Apennine mountains cast dramatic long shadows at quarter phase, and the straight wall of Rupes Recta is a favourite target.
Time your sessions to the terminator — the line between lunar day and night — where low sun angles throw every crater and ridge into relief. A full Moon is actually the worst time for detail (flat lighting), but the best time for ray systems, which pop against the bright disc. Photograph the same region across several nights and watch shadows sweep across it — a time-lapse of changing light no Earth landscape can match. With patience, phone photographers capture detail that Galileo would have wept for: craterlets inside craters, mountain shadows, the texture of ancient lava flows. Do not neglect earthshine either — the ghostly glow on the Moon’s dark side, sunlight reflected from Earth. It photographs beautifully during the crescent phases and is a reminder that we are looking at a world lit by two suns: our star directly, and our own planet’s reflected light. The Moon is the same target every night, yet never the same photograph twice.
Conclusion
Photographing the moon with your phone comes down to: shoot near the quarter phases, stabilise the phone, lock focus and exposure on the moon, drag exposure down, and edit lightly. For more night-sky inspiration, seeing the northern lights in the UK is the ultimate dark-sky reward. No telescope required — just technique, timing and a clear night.
Frequently Asked Questions
Why does the moon look like a white blob in my photos?
Your phone’s auto exposure brightens the dark sky and overexposes the moon. Tap the moon to focus, lock exposure, and drag it down until surface detail appears.
What is the best moon phase to photograph?
The quarter phases (first and last quarter), when angled sunlight creates long shadows along the terminator, revealing craters and mountains in relief. Full moons look flat by comparison.
Do I need a special app?
Not necessarily — the stock camera with locked focus/exposure works. Manual camera apps help on phones without pro modes, and moon-position apps help with planning.
Can I photograph the moon with digital zoom?
Up to your phone’s optical zoom limit, yes. Beyond that, digital zoom just enlarges pixels — better to shoot at optical zoom and crop afterwards.
Should I use night mode for moon photos?
Try both. Night mode’s long exposures can blur the moon’s motion; often a standard shot with locked, reduced exposure gives sharper results.
What phone settings matter most for moon photos?
Locked focus, manually reduced exposure, maximum optical zoom, and RAW capture if available. Everything else — filters, night mode, digital zoom — is secondary to those four.
Can I photograph a lunar eclipse with my phone?
Yes — eclipses are actually easier in some ways, since the dimmed “blood moon” does not overexpose. Use a tripod, lock focus on the moon, and bracket exposures to capture both the red disc and the surrounding stars.