How to Make a Volcano Experiment for Kids
Learn how to make a volcano experiment for kids with kitchen ingredients: step-by-step instructions, the science behind the eruption and fun variations.
The baking-soda volcano is the undisputed king of kids’ science experiments — and with good reason. In five minutes, with kitchen ingredients, it demonstrates a genuine acid-base chemical reaction with thrillingly visible results. But most families do the basic version once and stop. Done properly, the volcano becomes a whole afternoon of real chemistry: variables to test, eruptions to compare, and lava to engineer. Here is how to make the classic volcano experiment, then take it far beyond the basics.
The classic method, done right
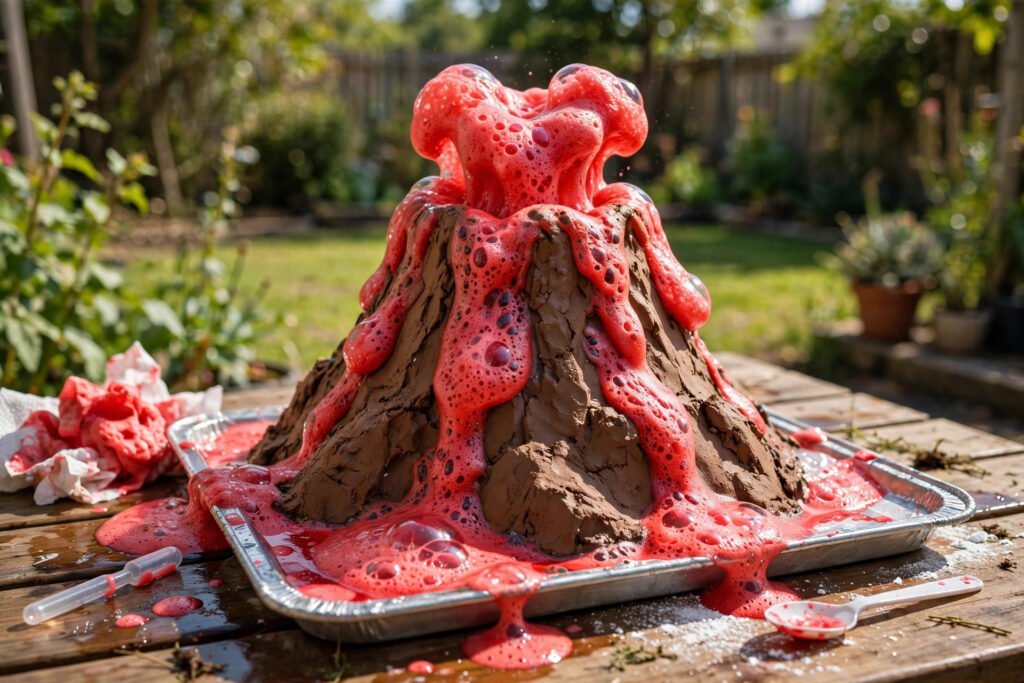
Build the volcano first — the construction is half the fun. Mould a mountain around a small plastic bottle using salt dough (2 cups flour, 1 cup salt, 1 cup water), air-dry clay, or even mud in the garden. Leave the bottle’s mouth clear. For the eruption: add 2 tablespoons of bicarbonate of soda to the bottle, a squirt of washing-up liquid (this is the secret to thick, foamy lava), and a few drops of red food colouring. Then pour in 100ml of vinegar and stand back. The fizzing eruption is the reaction of acetic acid with sodium bicarbonate, producing carbon dioxide gas — the foam is CO₂ bubbles trapped in soapy water. It is real chemistry, not a trick.
Turn it into real science: test the variables
Here is where the experiment levels up. Change one thing at a time and observe: warm versus cold vinegar (warm reacts faster — molecules move faster); more versus less bicarbonate; white vinegar versus lemon juice or cola (different acids, different fizz); with and without washing-up liquid (compare foam height). Have the kids predict results before each test and record what happens — prediction and observation are the scientific method in miniature. Time the eruptions, measure the foam height with a ruler, and crown a champion recipe. This is genuine experimental design, and children absorb it effortlessly because it is fun.
Level up: engineer a better volcano
Challenge the kids to design improvements: a taller, narrower vent for a more dramatic jet; multiple vents; layered colours (add colouring in stages); a “slow eruption” using a bicarbonate paste that releases gradually. Build a whole volcanic landscape with toy dinosaurs for scale. Older children can research real volcano types — shield, stratovolcano, cinder cone — and model the differences. The British Geological Survey’s schools resources show what real volcanoes do with the same gas-driven physics. The Science Museum Group’s family resources offer excellent extensions for curious young geologists.
The science to explain (by age)
For under-7s: “the vinegar and baking soda make tiny bubbles of gas, and the bubbles push the lava out.” For 7–11s: introduce acids and bases, and the idea that chemical reactions make new substances (carbon dioxide gas). For older kids: write the word equation (ethanoic acid + sodium hydrogen carbonate → sodium ethanoate + water + carbon dioxide), discuss reaction rates and variables, and connect to real geology — the same gas-driven physics erupts real volcanoes, just with magma instead of soap. Every age gets a true explanation pitched at their level — the same principle behind hands-on learning like growing herbs on a kitchen windowsill, where doing teaches more than telling.
Safety and clean-up
This is a very safe experiment, but supervise young children around vinegar (eye sting) and keep mixtures out of mouths in quantity. Do it outside or on a tray — the “lava” stains clothes and the red food colouring stains everything it touches. Wear old clothes or aprons. Clean-up is part of the lesson: the reaction products are harmless and wash away with water, which is itself worth noting — real chemistry you can rinse down the drain. For more edible chemistry, baking sourdough bread shows fermentation — another gas-driven transformation — in action.
Real volcanoes: the geology behind the experiment
The kitchen volcano is fun, but the real things are among Earth’s most powerful forces — and the same gas-driven physics applies. Real eruptions happen when dissolved gases in magma expand as pressure drops, exactly like the CO₂ in your bottle. Runny basaltic lava (think Hawaii) flows like your watery mix, building broad shield volcanoes; thick, gassy rhyolitic magma (think Vesuvius) explodes like an over-carbonated bottle, which is why some eruptions are fountains and others are catastrophes.
The famous eruptions make the chemistry vivid: Krakatoa 1883, heard 3,000 miles away; Vesuvius 79 AD, preserving Pompeii; Eyjafjallajökull 2010, whose ash cloud closed European airspace for a week. Britain has its own volcanic past — Edinburgh’s Arthur’s Seat and much of the Hebrides are ancient volcanoes, extinct for tens of millions of years. The “ring of fire” around the Pacific hosts most active volcanoes today, monitored constantly because eruptions affect climate (large ones cool the planet measurably) and aviation. Your kitchen eruption takes five minutes; real magma chambers build pressure for centuries. Same physics, rather different stakes. For the full experience, build an eruption timeline: research a real eruption such as Vesuvius, Krakatoa or Eyjafjallajökull, stage your model eruption, then present what the real one did — how far the ash travelled, how it affected climate. Connecting the kitchen experiment to real events transforms a fun afternoon into genuine earth science, and it is exactly the kind of project that wins science fairs.
Conclusion
The volcano experiment earns its classic status: five minutes, kitchen ingredients, genuine acid-base chemistry, and an eruption every child remembers. Build the mountain together, test the variables like real scientists, and use it as a doorway into geology, chemistry and experimental thinking. Some toys are forgotten in a week; the kid who engineered a better volcano remembers the science for years.
Frequently Asked Questions
What is the best volcano recipe?
2 tablespoons bicarbonate of soda, a squirt of washing-up liquid and red colouring in the bottle, then 100ml vinegar. Warm vinegar and the washing-up liquid are the two biggest upgrades to eruption height.
Why does the volcano erupt?
Vinegar (an acid) reacts with bicarbonate of soda (a base), producing carbon dioxide gas. The rapidly expanding gas bubbles foam up through the soapy mixture and out of the vent — the same gas-driven physics as real eruptions.
Can I use lemon juice instead of vinegar?
Yes — any food-safe acid works. Lemon juice, cola and even ketchup produce eruptions with slightly different character, which makes comparing acids a great follow-up experiment.
How do I make the lava thicker?
More washing-up liquid makes thicker foam; less water in the mix makes it flow more slowly, mimicking thick real-world lava. Experiment with ratios and record the results.
Is the volcano experiment safe for toddlers?
With close supervision, yes — the ingredients are kitchen-safe. Keep mixtures away from eyes and mouths, do it on a tray or outside, and expect enthusiastic mess.
What age is best for the volcano experiment?
Ages 4–10 get the most from it — old enough to help build and predict, young enough to be thrilled. Younger toddlers enjoy watching with close supervision; older kids can run the variable-testing version like real scientists.
Can I do the volcano experiment indoors?
Yes, on a large tray with old clothes or aprons — the mixture washes out with water. But the red food colouring stains, so cover surfaces and skip the colouring if you are worried about the carpet.