
How to Lay Laminate Flooring Yourself: A DIY Guide
How to lay laminate flooring yourself — tools, subfloor prep, laying technique and the finishing details for a professional-looking floor.
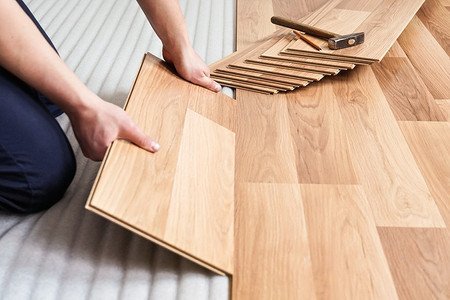
Laminate flooring is the great DIY leveller: a click-lock system designed so that ordinary humans can achieve a genuinely professional-looking floor in a weekend, for a fraction of the fitted price. A 20m² living room costs £300–600 in materials and a weekend of your time, versus £800–1,200 fitted. The catch? The 10% of the job that’s preparation determines 90% of how the floor looks in five years.
Here’s how to lay laminate flooring yourself properly — the prep that matters, the laying technique, and the finishing details that separate a DIY floor from a DIY-looking floor.
Tools, materials and acclimatisation
You need: laminate (buy 10% extra for waste), underlay (the right type for your subfloor — more below), a jigsaw or laminate cutter, spacers, a tapping block and pull bar (the £15 fitting kit is worth every penny), a tape measure, square, pencil, knee pads (non-negotiable — your knees will thank you), and a multitool or handsaw for door architraves.
Then acclimatise: stack the unopened packs flat in the room for 48 hours. Laminate expands and contracts with temperature and humidity, and laying it cold from the garage guarantees gaps later. While you wait, check the subfloor — the single most skipped step. It must be clean, dry and level to within 3mm over 2 metres. Concrete subfloors need a damp-proof membrane underlay; wooden subfloors need the standard foam or fibre underlay. Bouncy or squeaky boards underneath? Fix them first — our guide to fixing squeaky floorboards covers exactly that.
- Buy 10% extra; acclimatise packs flat in the room for 48 hours.
- Subfloor must be level within 3mm over 2m — check with a long straight edge.
- Damp-proof underlay on concrete; fix squeaks and bounce before you start.
Preparation: the unglamorous 90%
Remove skirting boards if you can — it gives a far cleaner finish than beading, and refitting painted skirting is easy. If the skirting stays, you’ll need scotia beading to cover the expansion gap, which never looks as good. Undercut door architraves so the laminate slides underneath: lay a plank upside-down against the architrave and saw along it.
Plan the layout before opening a pack. Lay planks parallel to the longest wall or towards the main light source — both look natural. Measure the room width and calculate the last row: if it’ll be narrower than 5cm, rip the first row narrower so the last row is a decent width. Stagger end joints by at least 30cm between rows (never align them — it looks amateur and weakens the floor), and keep offcuts over 30cm to start new rows.
- Remove skirting for the cleanest finish; undercut architraves.
- Plan so the final row is wider than 5cm; stagger joints 30cm+.
- Keep offcuts over 30cm — they start the next rows.
How to lay laminate flooring: the technique
Start in the left corner of the longest wall, tongue facing the wall, with 10–12mm spacers maintaining the expansion gap on all sides. Click the short ends together for the first row, then build subsequent rows by angling each plank into the long edge of the previous row and lowering it — you’ll feel and hear the click. Tap gently with the tapping block (never hammer the plank directly) to close any gaps.
The last plank in each row needs cutting: flip it end-to-end, mark where it meets the spacer, cut with the jigsaw (decorative side up for jigsaws to avoid chipping, or use a laminate cutter for dust-free cuts). For pipes, drill a hole 10mm larger than the pipe diameter, cut a wedge behind it, fit around the pipe and glue the wedge back. Work steadily — rushing the clicking is how you get damaged locking mechanisms and gappy joints.
- 10–12mm expansion gap on ALL sides, maintained with spacers.
- Angle-and-click the long edge; tap with the block, never hammer directly.
- Cut last planks flipped end-to-end; drill pipe holes 10mm oversize.
Tricky bits: doorways, thresholds and stairs
Doorways are where DIY floors show their quality. The professional approach: undercut the architrave and slide the laminate underneath, so there’s no visible cut edge. For transitions between rooms, use proper threshold strips (T-bars for same-height floors, ramps for different heights) — never just butt two floors together or leave a raw edge.
Around obstacles, make cardboard templates first — it’s faster than measuring complex shapes twice. For the final row, you’ll likely need to rip planks lengthwise; use the pull bar to click them in tight against the wall. And a note on stairs: laminate on stairs is a specialist job involving nosing profiles and adhesive — it’s doable, but it’s not a first project. Flat floors first.
Finishing and aftercare
Remove the spacers, refit the skirting (covering the expansion gap — this is why the gap exists), and fit threshold strips at doorways. Walk the floor listening and feeling for movement or hollow spots — a plank that rocks needs lifting and relaying now, not in six months. Vacuum thoroughly (installation dust gets everywhere) and do a final damp-mop with a well-wrung mop.
Aftercare is simple: never wet-mop laminate (standing water is its enemy — damp mop only), use felt pads on furniture feet, put doormats at entrances (grit is sandpaper under shoes), and clean spills promptly. Quality laminate lasts 15–25 years with this treatment. If you’re choosing flooring for the whole house, our guide to the best flooring for a busy family home compares laminate against the alternatives room by room.
- Refit skirting over the expansion gap; fit proper threshold strips.
- Damp-mop only — never wet-mop; felt pads on all furniture.
- Doormats at every entrance; clean spills promptly.
Laying laminate yourself is genuinely one of the best-value DIY projects: a weekend, a few hundred pounds, and a floor that looks like you paid a professional — provided you respect the prep. Acclimatise the packs, level the subfloor, maintain the expansion gap, and take your time with the clicking. The floor will be under your feet for the next twenty years; it deserves one careful weekend. Which?’s flooring guides rate laminate brands for durability if you are choosing materials.






1 thought on “How to Lay Laminate Flooring Yourself: A DIY Guide”